S’more Creme Brulee

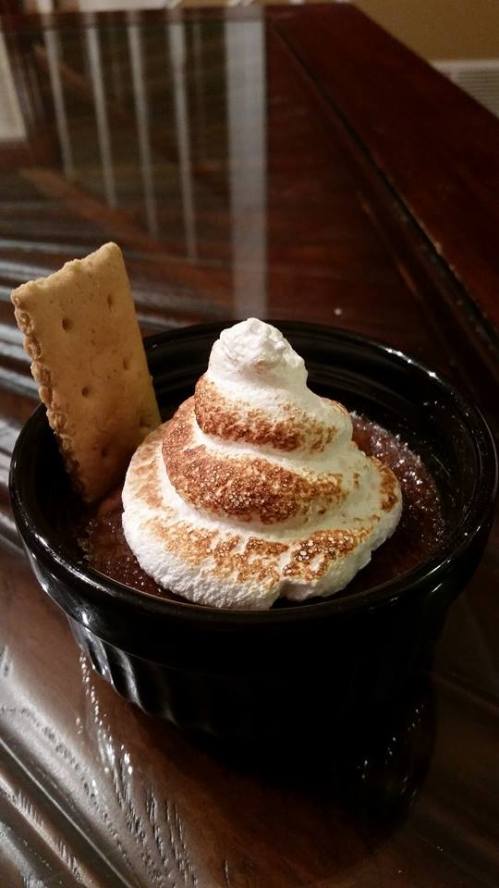
s'more creme brulee

I found this recipe on Pinterest and just had to try it.  Who doesn’t like s’mores and any chance to use my kitchen blow torch is always welcome.  Of course, you’ll have to find some gluten-free graham crackers or make your own to make this dish completely gluten free.

CHOCOLATE CRÈME BRÛLÉE

  • 2 cups heavy cream
  • 4 tablespoons sugar
  • 5 large egg yolks
  • 4 oz  semisweet or bittersweet chocolate , finely chopped (I used good quality semi sweet mini chips)

MARSHMALLOW MERINGUE

  • 4  large egg whites
  • 1 cup sugar
  • 1 teaspoon vanilla extract

TO FINISH

  • extra sugar for bruleeing
  • gluten free graham crackers if you can find them (or a similiar flavor gluten free cookie)

FOR THE CRÈME BRÛLÉE:

  • Preheat oven to 300 degrees F. Set out six ramekins and a roasting pan that will fit all the ramekins comfortably.
  • Combine cream and 3 tablespoons of the sugar in a medium saucepan. Bring to a boil on the stove.
  • Meanwhile, whisk egg yolks and remaining tablespoon of sugar together in a medium bowl.
  • When the cream has just come to a boil, add chocolate to the saucepan and stir until chocolate is fully melted and combined with the cream.
  • Slowly pour the hot chocolate mixture into the egg yolks, whisking constantly to prevent eggs from cooking. Strain mixture into a bowl or measuring cup.
  • Divide custard mixture evenly among prepared ramekins. The mixture should come up just a little shy of the rim of the ramekins. Tap the ramekins lightly on the counter to get rid of any air bubbles.
  • Place ramekins in roasting pan so they are not touching the sides. Fill the pan with hot water about halfway up the height of the ramekins.
  • Carefully place roasting pan in oven and bake for about 25-30 minutes, until the custard appears set but still jiggly. If you are using wide, shallow ramekins (like the ones in my photos), it will take closer to 25 minutes. If you are using smaller, deeper ramekins, it may take a little longer to set.
  • Remove from oven and carefully take out ramekins from roasting pan. Let cool until you can touch the ramekins, then cover and chill for at least 2 hours.

FOR THE MERINGUE:

  • Combine the sugar and egg whites in a medium metal bowl and place over a pan of simmering water.
  • Whisk the sugar mixture constantly over heat until the sugar is dissolved and the mixture looks smooth and shiny, about 3 minutes.
  • Remove mixture from heat and pour into a stand mixer bowl. Whisk on medium speed for about 5 minutes until the mixture has cooled.
  • Beat on high speed until stiff glossy peaks form, about another 5 to 10 minutes. Add vanilla and beat to combine.
  • You can now scrape the meringue into a piping bag to pipe, or if you want to keep it simple you can just dollop it on top of your dessert.

TO ASSEMBLE:

  • Sprinkle top of each ramekin with about a tablespoon of sugar. Use a kitchen torch or broiler to caramelize the sugar.
  • Pipe or spoon the meringue over the top of the ramekin. Use a kitchen torch or broiler to lightly toast the meringue.
  • Insert a few graham cracker pieces or cookie pieces into the brûlée and serve immediately.

The Hundred Foot Journey and Good Flatbread

Flatbread

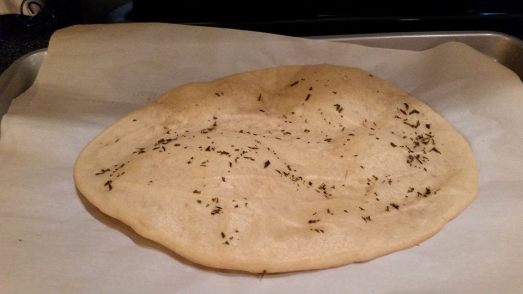
The other day I rented The Hundred Foot Journey from Redbox.  I’m a total foodie so I love movies that center around food.  This was such a sweet story and I really enjoyed the journey Hassan takes in this film.  Manish Dayal plays Hassan and he’s not too shabby to look at it either.  I realized as I was watching the film that I started craving indian food so for the next couple of days I was knee deep in curries, rice and flatbread.  This gluten-free flatbread turned out fabulous so I just had to share.

Try your hand at making this at home and then watch The Hundred Foot Journey for yourself.  Let me know if you loved it like I did!

Ingredients:

Directions:

Preheat oven to 450° Fahrenheit.

In a large bowl, combine coconut flour, tapioca flour and salt.

In a small saucepan, combine coconut oil  and coconut milk and heat it up until it’s just warm and integrated and any solid particles of the coconut oil are melted. Do not overheat and do not boil.

Pour heated oil mixture on top of dry ingredient mixture and mix until thoroughly combined.

Put the mixture into the fridge to allow it to cool slightly.

While the mixture is cooling, line 2 baking sheets with parchment paper. (Note, you can also use a pizza stone or cast iron skillet instead of baking sheets.)

Remove mixture from fridge and add beaten eggs. Combine thoroughly.

Pour 1/2 of mixture onto each baking sheet.

Flatten mixture into 1/4 inch thick flatbread shape using a spatula.

Sprinkle with garlic (or rosemary or any other seasonings or herbs).

Bake in 450° oven for 10 – 12 minutes.

The flatbread is best eaten within a few hours after baking, but it can store overnight. If you store it overnight, it does taste best to toast it slightly before eating.

Hundred Foot_

Ode to Elvis – Chocolate Peanut Butter Pudding with Bananas

Choc Peanut

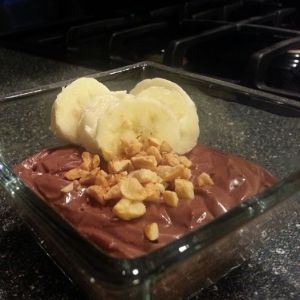
This is a simple homemade pudding that even the King himself would be proud of.  I used a Hershey bar for the chopped chocolate and garnished with some fresh sliced bananas.  As you let the pudding cool in the pan before you put in serving dishes cover the pudding with plastic wrap sitting right on top of the pudding to avoid the dreaded “pudding skin” from forming.  Once it was cool enough I divided mine among four serving dishes and let it chill for about an hour. Now, Don’t Be Cruel and make yourself a batch. 🙂

Ingredients

  • 1/3 cup granulated sugar
  • 2 tablespoons cornstarch
  • 2 tablespoons Dutch process cocoa
  • 1 1/2 cups 1% low-fat milk
  • 1/2 cup cream
  • 2 ounces milk chocolate, finely chopped
  • 1/4 cup creamy peanut butter
  • 1 tablespoon chopped unsalted, dry-roasted peanuts

Preparation

  1. Combine sugar, cornstarch, and cocoa in a medium saucepan; stir with a whisk. Whisk in milk and cream. Bring to a boil over medium-high heat. Cook 1 minute or until thick and bubbly. Remove from heat. Add chocolate and peanut butter, stirring until smooth. Spoon about 1/3 cup pudding into each of 6 bowls. Top each serving with 1/2 teaspoon peanuts.


Roasted Chickpea Salad with Barbecue Dressing

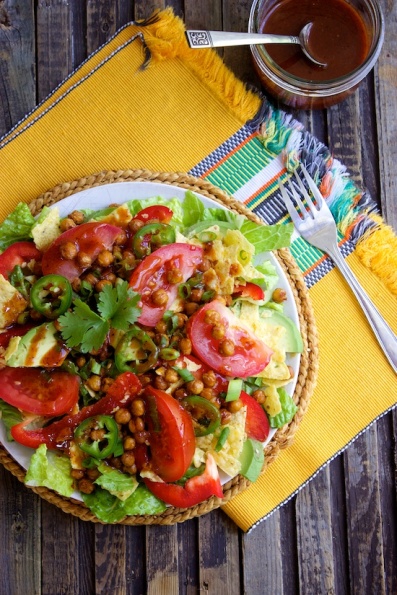
BBQ-Chickpea-Salad-2We like to do meatless meals at my house on occasion.  I found this recipe online courtesy of kitchensimplicity.com  and tried it recently.  OMG!  Both my carnivore husband and I were scarfing this down like there was no tomorrow.  This salad is packed with flavor so if you are vegetarian and want a great 4th of July option make sure you try it out.  I felt good eating this healthy meal and it was very easy to prepare.  I roasted my chickpeas a day in advance and then kept them in a sealed container and heated them for a few minutes in the oven after the salad was ready.

Ingredients:

  • 1 heart of romaine lettuce, chopped
  • ½ red bell pepper, sliced
  • ½ avocado, sliced
  • 1 cup crushed tortilla chips
  • 1 medium tomato, chopped or wedged
  • 1 cup spice-roasted chickpeas (recipe below)
  • 1 green onion, chopped
  • ½ jalapeño, sliced (seeds removed)
  • salt and pepper, to taste
  • cilantro for garnish, optional

Barbecue Dressing:

  • 2 tablespoons apple cider vinegar
  • 2 tablespoons extra virgin olive oil
  • 2 tablespoons good quality ketchup
  • 2 tablespoons brown sugar
  • ½ tablespoon dijon mustard
  • ½ tablespoon worcestershire sauce
  • 1 teaspoon chili powder
  • ½ teaspoon ground cumin
  • ½ teaspoon salt
  • ⅛ teaspoon pepper
  • ⅛ teaspoon hot pepper sauce

Instructions

  1. Arrange lettuce in one large, or two medium, salad bowls (or plates). Top with remaining salad ingredients. Drizzle with dressing just before serving. Toss to coat.

Barbecue Dressing

  1. Place all ingredients in a small jar. Screw lid on. Shake until evenly combined. Store, covered, in the fridge. (alternatively you can mix this in a small bowl with a whisk)

Roasted Chickpeas

Makes: approximately 3 cups

Ingredients:

  • 2 (19 oz) cans chickpeas, rinsed and drained
  • 1 teaspoon chili powder
  • ½ teaspoon cumin
  • ½ teaspoon salt
  • ¼ teaspoon garlic powder
  • 2 tablespoons extra virgin olive oil
  • ⅛ teaspoon hot sauce

Instructions

  1. Spread the chickpeas out on a clean kitchen towel. Fold towel over and rub gently to dry. Transfer the chickpeas to a medium sized bowl, removing any skins that have been rubbed off. Add remaining ingredients to bowl and toss to coat.
  2. Spread chickpeas out onto a parchment lined baking sheet. Bake at 400ºF for 40 minutes or until browned and crisp, stirring once in the middle. Let cool completely before covering, in a sealed container. Store at room temperature for a few days or freeze for longer storage.  If you freeze them pop them in the oven under a broiler to crisp them back up.


Flourless Peanut Butter Cookies

peanut butter cookies


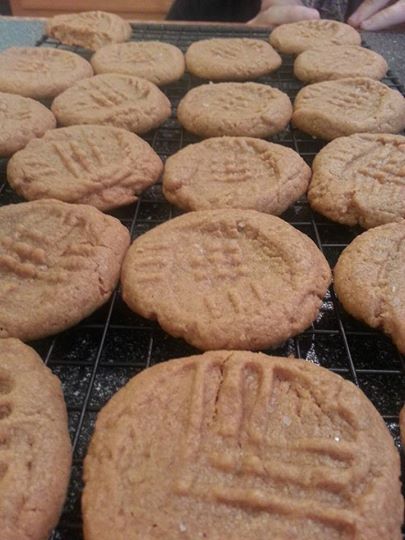
I made these cookies over the weekend and they were so easy and tasted so good.  They were great warm out of the oven or a few days later.  They stayed soft and slightly chewy and that little hint of coarse sea salt was devine.


Ingredients:
2 cups natural peanut butter
2 cups sugar
2 teaspoon pure vanilla extract
2 large egg, lightly beaten
Coarse sea salt, for sprinkling

Directions:
Preheat the oven to 350 degrees F and place the racks in the upper and lower third of the oven.

In a medium bowl, mix the peanut butter, sugar, vanilla and egg until well combined. Spoon 1 tablespoon of the mixture about 1 inch apart onto ungreased baking sheets. Flatten the mounds with the tines of a fork, making a crosshatch pattern on the cookies. Sprinkle coarse salt on top of the cookies.

Bake until golden around the edges, about 10 minutes, switching the position of the sheets halfway through baking. Transfer to racks to cool. Repeat with the remaining dough.
Makes about 26 cookies.

Aldi Gluten Free Products

Aldi Live Gfree

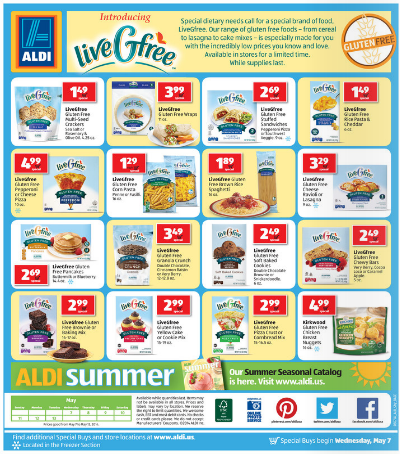
I’ve shopped at Aldi a few times over the course of the last few years, but this week’s ad featuring tons of gluten free products brought me back in the store.  I purchased some brownie soft-baked cookies, strawberry breakfast bars, crackers, blueberry frozen pancakes, and corn fusilli pasta.  These are only a few examples of the products available and they are at much better prices than you will find at other stores.  If you’ve never been to Aldi before be prepared to spend some money on renting a grocery cart ($.25 gets you a cart and you get it back when you return the cart), you’ll also need to be prepared to pay for bags or else bring your own bags.  You will bag your own groceries too…..all these things keep the prices low at Aldi stores.

If you are looking for some bargain gluten-free products to try definitely check our ALDI.


Chicago Deep Dish Gluten Free

Chicago Deep Dish


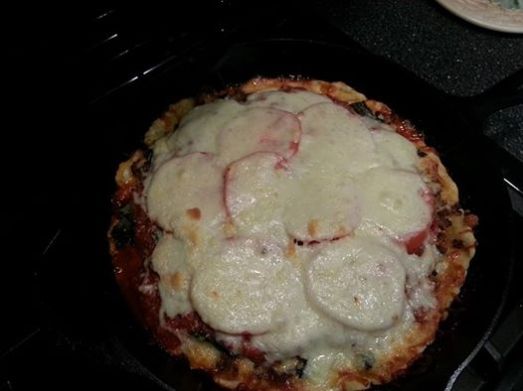
My kids love pizza and recently we were talking about Chicago Style Pizza.  They had never tried it before so I decided to take a shot at making some gluten free.  I reviewed lots of recipes online, but decided on a simple one using the Betty Crocker gluten free rice flour blend.  Although my crust didn’t rise too much (I only gave it an hour so next time I’ll try it longer) the result was one of the best gluten free pizzas we’ve had as a family.  The kids and everyone in attendance loved it.

Ingredients

2 cups all-purpose gluten-free flour
1 1/2 teaspoons xanthan gum
1/4 cup coarsely ground yellow cornmeal
1 tablespoon active dry yeast
1 tablespoon sugar
2 teaspoons kosher salt
4 tablespoons canola (or other neutral) oil
3/4 cup warm water (about 100° F)
1 to 2 tablespoons extra virgin olive oil for drizzling

Directions

  •  In a medium-size bowl or the bowl of your food processor, place the flour, xanthan gum, cornmeal, yeast, sugar and salt and stir or pulse to combine.
  •  To the flour mixture, add the 4 tablespoons of canola oil and the water in a steady stream, either pulsing in a food processor or mixing with a spoon or fork to combine. If you are using a food processor, pulse while streaming in the water, until a ball begins to form. Otherwise, stir constantly while streaming in the water and continue stirring until the mixture begins to come together. If the dough seems super sticky, add some more flour a tablespoon at a time, and stir or pulse to combine. Press the dough into a disk.
  •  Place the dough in another medium-size bowl and drizzle it with the olive oil. Turn the dough to coat it with oil. This will prevent a crust from forming on the dough while it is rising. Cover the bowl with plastic wrap and place it in a warm, draft-free area to rise until it is about 1 1/2 times its original volume (about 1 hour or more).
  •  After the dough has risen, wrap it in plastic wrap and chill for at least an hour.
  •  When you are ready to make the pizza, preheat your oven to 425° F. Grease well with canola oil a 12 inch round baking dish or a cast iron skillet if you have it.
  • Press the pizza dough evenly into the bottom of the pan and up the sides, leaving a small clean edge toward the top of the pan so there aren’t exposed edges that can burn easily during baking. The corn meal will have made the pizza dough much less smooth and pliable than ideal, but it is worth it for the taste in the final product. Trust me.
  •  To assemble the pizza, use whatever ingredients you like. Slather the bottom and sides of the crust with softened unsalted butter. This will give the crust a nice buttery taste.  Then layer in slices of cheese of provolone cheese then whatever else you like (I used cooked italian bulk sausage, pepperoni, fresh basil, bacon fresh sliced tomatoes, & mozzarella cheese), cover with tomato sauce and a thin layer of finely grated Parmesan cheese.
  •  Tent the pan with aluminum foil, and place it in the center of the preheated oven.
  • Bake for 20 minutes, uncover, and bake again until the sauce and cheese are bubbling and the crust is nicely browned (about another 10 minutes).
  • Cool in the pan for at least 10 to 15 minutes. Serve right away.

I made a homemade pizza sauce for my pie using these ingredients:

28 oz can crushed tomatoes

1 medium white onion diced

2 large garlic cloves, minced

2 tsp dried oregano

1 tsp granulated garlic

1 T dried italian seasoning

1/4 tsp crushed red pepper flake

pinch of sugar

1/2 c water

Put everything in the pot and simmer for a good hour for the sauce.


Gluten Free Irish Car Bomb Cupcakes


Irish Car Bomb Cupcakes


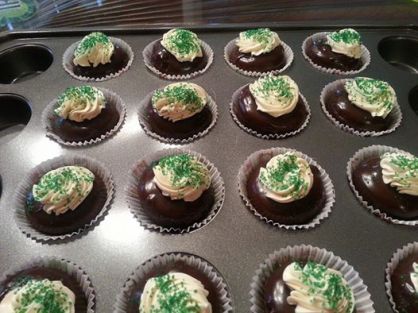
I took a shortcut with these cupcakes and they came out really good.  I don’t like beer so I opted to just make a plain chocolate cake with a whiskey ganache and a Bailey’s frosting.  These will satisfy any little leprechaun!

Cupcake Ingredients:

Betty Crocker Gluten Free Chocolate Cake Mix

1/3 c sour cream

3 eggs

1 cup water

Prepare cake batter as directed, but add sour cream.  This gives you a really moist cake.  Pour the cake batter in large or mini muffin tins.  I sprayed my muffin tins with non-stick spray and then put the cupcakes in pretty cupcake wrappers after they cooled.  Bake regular size cupcakes for 20-24 minutes in 325F oven.  Mini cupcakes take about 15-16 minutes.  Let the cupcake cool and then work on the ganache.

For the Whiskey Ganache:

8 ounces bittersweet chocolate
2/3 cup heavy cream
2 tablespoons butter, at room temperature
2 teaspoons Irish whiskey

Finely chop the chocolate and transfer it to a heatproof bowl. Heat the cream until simmering and pour it over the chocolate. Let it sit for one minute and then, using a rubber spatula, stir it from the center outward until smooth. Add the butter and whiskey and stir until combined. Taste as you add whiskey a little at a time to make sure you don’t overdo it.  Let the ganache cool until thick but still soft enough to be piped or spooned into large hollowed cupcakes.  For the mini cupcakes I dipped them into the ganache and left the cupcakes whole.

Let the ganache set and then make your frosting.

For the Baileys Frosting:

2 cups unsalted butter, at room temperature
5 cups powdered sugar
6 tablespoons Bailey’s Irish Cream

Using the whisk attachment of a stand mixer, whip the butter on medium-high speed for 5 minutes, scraping the sides of the bowl occasionally. Reduce the speed to medium-low and gradually add the powdered sugar until all of it is incorporated. Add the Baileys, increase the speed to medium-high and whip for another 2 to 3 minutes, until it is light and fluffy.

Using your favorite decorating tip, or an offset spatula, frost the cupcakes and decorate with green sprinkles.  Store the cupcakes in an airtight container.

Cheddar Bay Biscuits

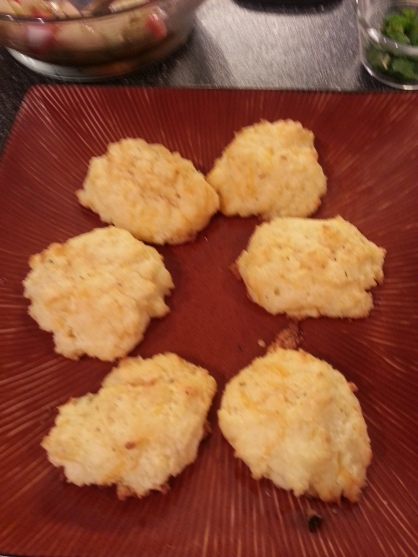
Cheddar Bay Biscuits


You remember those yummy biscuits they serve at Red Lobster?  You know the ones that tasted so yummy you could make a meal out of just those, well I found a good gluten free recipe that tastes very close to the real deal.  Try them at home and let me know your thoughts.


Ingredients:

2 cups Gluten Free Bisquick

5 tablespoons cold diced unsalted butter
1 1/2 cups shredded cheddar jack cheese
3 eggs
2/3 cup heavy cream
4 tablespoons melted butter
1/2 teaspoon garlic powder
1/4 teaspoon Old bay seasoning
1/2 teaspoon dried parsley

Instructions:

Preheat oven to 400° F. First step is the wet ingredients for the biscuits. Mix eggs and heavy cream together, stirring until eggs are broken and everything is well blended. In a separate bowl add your 2 cups of Gluten Free Bisquick and add in cold butter using a pastry cutter or I used a large fork. Blend together until you have a coarse crumbly mixture and the butter is not visible. Add cheese into the dry mixture then add your wet ingredients until a soft dough forms.

Now make the seasoned butter which makes these taste so much like the Red Lobster version. In a new bowl blend melted butter, Old Bay seasoning, garlic powder and parsley, set aside to use later.

Drop the biscuits onto a cookie sheet and round the edges I used a regular spoon. Bake for about 12 minutes then take the biscuits out and brush on  a thick layer of the seasoned butter then bake for an additional 3 to 5 minutes. Biscuits should be a light golden brown color. This made about 22 biscuits. These are best served immediately but also delicious the next day.

Cinnamon Bundt Cake

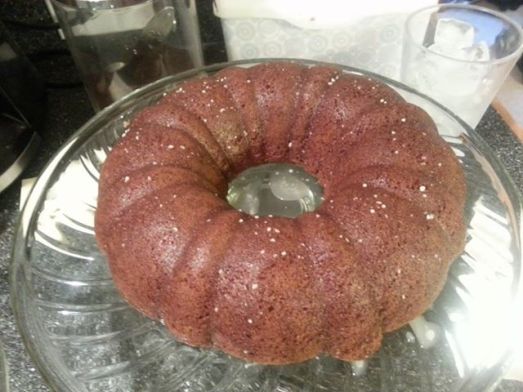
Bundt Cake


Don’t you love the feeling of fall in the air?  The smell of the cinnamon brooms as you walk into the grocery story always entices me.  This past weekend I decided to try my hand at a cinnamon bundt cake and it was delicious.  The cake was very moist and so easy to make.  I was disappointed with the icing glaze recipe that was listed with the cake.  I followed the instructions, but my glaze was clear and disappeared into the cake so I served mine with a little sweetened whipped cream too.  I’m adding a different glaze recipe to this that should work better.


Ingredients

For the Cake

  • ¾ cup sorghum flour
  • ¾ cup potato starch
  • ½ cup tapioca starch
  • 1¼ cup granulated sugar
  • 1 teaspoon xanthan gum
  • 1¼ teaspoons baking soda
  • ¾ teaspoon baking powder
  • ½ teaspoon salt
  • 1½ teaspoons cinnamon (Vietnamese if you have it)
  • ⅓ cup butter
  • 2 large eggs
  • 1 teaspoon vanilla extract
  • 1 cup buttermilk or 1Tablespoon vinegar + milk to = 1 cup

For the Glaze

  • 1 tsp butter
  • 1 1/2 c confectioners sugar
  • 2 1/2 tsp milk
  • 1/4 tsp vanilla extract
  • 1/8 tsp salt

Instructions

  1. In a small bowl combine the dry ingredients.
  2. In your mixer bowl, beat the butter. Add the eggs and vanilla and beat again.
  3. Add the dry ingredients and milk alternately in fourths, starting and ending with the dry ingredients. Mix well, scraping the bottom of the bowl to be sure the butter is incorporated.
  4. Spoon the batter into a sprayed or greased bundt pan.
  5. Bake at 325° for 50 minutes.
  6. Cool in the pan for 10 minutes, then transfer to a wire rack.
  7. Melt butter for glaze and then add the rest of glaze ingredients.  Drizzle glaze over cooled cake.